Independent Gear Review of Evernew “Appalachian” Set, Cook Kit… Highly recommended!!
Pros…
- Full titanium (Ti) construction
- Lightweight… Ti DX stove/windscreen set weighs 93g, Appalachian kit 168g
- Accommodates alcohol, wood and solid fuel tabs
- Compact
- Built well, fairly strong
Cons…
- Slower burn time than I’d like
- Just a touch too much fuel consumption
Evernew’s “Ti DX Set w/Stove” (combination stove/flame diffuser/windscreen) was an enthusiastic find! Discussion of Evernew’s “Appalachian” set is discussed below. While performing an internet search several years ago for alcohol stoves I came across this stove sometime before it was commercially available in the USA. This was the same time I became interested in becoming an ultra-lightweight trekking enthusiast with a need to lighten gear, including my cook kit. Due to Evernew’s claimed weight of 86g (mine weighs 93g) and the multi-fuel versatility including alcohol and solid fuel, I had to have it. I placed myself on a retailers waiting list and was one of the first to receive it. Ultimately, I had a very difficult time finding one and paid full retail, which I believe was fair for a titanium stove set and well worth the price.

(1) Evernew’s Appalachian set at camp
The “Ti DX Set w/Stove” (referred to as Ti DX from here on in), Evernew’s item #EBY-255, composed entirely of Titanium, includes the stove, item #EBY-254 (if purchased separately) and the windscreen/flame diffuser, item #EBY-257 (if purchase separately)…

(2) Evernew Ti DX set w/stove; component break-down

(3) Evernew Ti DX set w/stove (flame diffuser leaning against windscreen)

(4) Evernew Ti DX set w/stove in collapsed form for carrying convenience and storage.
Evernew’s Ti DX set was my introduction to the world of alcohol stoves. Until this time, for very many years, I made use of heavy single-burner Coleman stoves eventually giving way to canister stoves, which I also found to be very cumbersome due to the size and weight of the fuel canisters, particularly when empty. There was absolutely no positive volume savings in my pack once the fuel canister was spent, fuel weight only. The lack of volume savings seemed such a waste. The canister stoves (I currently own and have owned), in all due respect, may be super lightweight and they burn fast and hot. Thus, making the leap from canister isobutane to denatured alcohol was considerably based on two factors: overall weight in combination with volume (considering the empty isobutane container) savings. There is also the possibility that a canister stove, which may be as light as 30g, malfunctions or clogs, essentially rendering itself useless unless a maintenance kit including parts and tools are carried, a small weight burden but a burden nonetheless. The Ti alcohol stove has no moving parts, nothing to malfunction. In fact, the only way to destroy this stove is to seriously mistreat it or accidentally step on it yet I believe this highly-durable stove will continue to function in any such mishap.
Set-up is easy! Simply set the base/windscreen and stove together on the ground and pour up to 60ml of alcohol fuel into the stove. The stove, incidentally has a 60ml capacity. Now, light the stove using your choice of either a lighter, match stick or magnesium fire starter. My preference is either a magnesium fire starter or lighter, though, I’ve used them all and they all function well. The stove will take a minute or so to prime. At this time assemble the upper windscreen/pot support (this is important: horizontal holes on the bottom, vertical holes on the top) and place the flame diffuser (if desired, it does not need to be used) inside the pot stand. You’re now ready to place your pot on the support. It’s that easy. If the stove has not fully primed at this time you may continue to place your pot on the stove knowing that you will not extinguish the flame. You’ll notice two larger holes in the two halves of the windscreen. I always position these holes on the same side of the unit and, in turn, position the unit so that these holes are downwind to prevent a strong breeze from extinguishing the flame. Due to the nature of the stove there is absolutely no flame control. I have also used the stove in the exact configuration as the picture immediately above. This set-up worked well for me using a skillet. Flame control at this point is by hand, moving the skillet above the flame.
To utilize the stove for wood or solid fuel tabs I would fit the flame diffuser immediately to the inside bottom of the base. You’ll now notice how easy it becomes to slide solid fuel onto the flame diffuser. You may now set the upper portion (once again horizontal holes on the bottom, vertical holes on top) of the windscreen/pot support on to the base and you’re ready to cook. If you’re using solid fuel tabs and find it more desirable to have the flame closer to the pot you may also place the flame diffuser and solid fuel tab in the top half of the windscreen and light. I, personally have no desire to ever use fuel tabs, albeit the stove easily accommodates this fuel type, I hear they make a big mess. A mess is not what I want on the trail or in my backpack.
I did my research… There are dozens and dozens of alcohol stoves on the market from super lightweight Ti and aluminum stoves to homemade cat can stoves. The design that seemed to trump most other stoves (efficient burn time, ease of use, etc.), seemed to be very similar in design to the Evernew Ti DX, save the fact that this kit will also burn solid fuels and is composed entirely of durable titanium. Therefore, the Ti DX stove set simply made sense for me… ultimate and essential deciding factors include… ease of use; an acquired overall weight and volume savings; no moving parts to malfunction and no repair kit needed; the stove’s ability to burn several fuel types (extremely important in an emergency or miscalculated fuel equation); and the set is entirely composed of a damage-resistant Ti construction.
Dimensionally, the Ti DX stove set (collapsed dimensions are approximately 3.26″ x 2.56″) is not much smaller than an isobutane canister but weighs a whole bunch less at 93g. I’ve tried utilizing any available space inside the stove set once it’s collapsed, however, there is relatively little space left. This kit is compact and very well built.
Since I’ve now made the leap into the world of alcohol stoves I needed a vessel for carrying alcohol that would require as little space as possible. The best I’ve found is the 800ml capacity PlatyPreserve (Cascade Designs) wine preservation bottle. In the process of consuming fuel this soft-sided flexible bottle compresses tightly taking up little space when empty; weight of the bottle is negligible at 24g. I generally use 60ml of fuel per burn, which is plenty to boil 450ml of water and, in an average boil time of 9 minutes (time beginning once the stove is lit), depending on the altitude. That may sound like a slow boil time and indeed it is. I’ve been able to boil 450ml of water with 30ml of fuel with a more substantial windscreen, no wind or in a controlled environment a minute or so faster but not too much. The stove requires, like any alcohol stove, time to prime before a full flame bloom is obtained.
The 450ml (overall volume 500ml) pot I use to accompany the Ti DX stove set is Evernew’s somewhat proprietary 500ml Mug Pot, item #ECA-266 (if purchased separately). Evernew conveniently offers for sale the “Appalachian” set, a combination Ti DX stove set and 500ml Mug Pot, item #ECA-268. At the time I purchased the Ti DX stove set the Mug Pot had not been an available option and had been immediately ordered once discovered. Here’s why (see photo #5)… the Mug Pot’s structurally significant design securely compliments the inside of the Ti DX pot support/windscreen perfectly. Exclusivity has its disadvantages on the trail and fortunately the Mug Pot will work with many other stove types if you choose to go that direction although it is designed to compliment the Ti DX stove set. This design, I have found, virtually eliminates the possibility the entire set will tip over due to reasonably high wind or when you’re stirring your meal, a very attractive feature when water, food and consumed calories are imperatively essential to life on the trail.

(5) Bottom inverted plateau of the Mug Pot fits securely inside the pot support/windscreen.

(6) Evernew’s Appalachian set
I’ve used pots of various brands and volume capacities before purchasing the Mug Pot and none of them had performed as well as the Mug Pot, more than likely because the design allows the Mug Pot to nest closer to the blue (hottest portion) flame. I’m quite sure Evernew’s 500ml Mug Pot is the only size available. If you’re looking for a larger pot to suite more than one individual you’ll need to go with a conventional pot with a diameter of at least 3.50″. The Appalachian set is, in fact, a solo backpacking kit arrangement. When I’m on the trail with a friend I continue to, and desire to fully exploit this entire set. However, there are limitations… due to the size of the pot, I’m boiling 450ml at a time, a couple times or more, and specifically consider alcohol fuel consumption in the equation, knowing that if I should burn all alcohol sooner than calculated or unexpectedly extend my adventure I may alternatively rely on sustainable gathered wood fuel. I could, of course, carry a larger pot but I choose not to. On a solo backpacking trip, for example, I may boil water to rehydrate my dehydrated breakfast meal and while its rehydrating I’ll boil water a second time for coffee. Sounds monotonous but I prefer to enjoy the benefits of the Appalachian set than all else I’ve carried in the past! Thus, I always carry the Appalachian set along with a separate Ti mug, either a 450ml or 600ml, neither of which I’ve been able to nest, regardless of the mug manufacturer.
The Ti DX set, incidentally, fits well enough (room to wrap he Ti DX set with a small cloth to baffle all residual noise produced by movement) inside the Mug Pot. The entire set including mesh stuff sack weighs 177g, 168g without the stuff sack. There is a balance of empty space inside the Appalachian set for the small wash cloth, also a lighter or matches and possibly an additional small knick knack but not too much more.

(7) Appalachian Set in operation (Vargo 650ml Ti Bottle, Vargo 450ml Ti mug and the PlatyPreserve shown are NOT part of the Appalachian set)
Overall, I’ve thoroughly enjoyed using Evernew’s Appalachian set and will continue to use it for as long as I continue backpacking. The convenience, size, weight and ability to burn several fuel types makes this stove very advantageous on the trail.
I’d like to mention that although I have never run out of alcohol and have never used it as a wood or fuel tab burning stove I’m sure the time will come and I’ll be as pleased with its performance as I am now. I have also never incorporated an additional windscreen. There have been times I may have needed one due to high winds slowing boil time, but the stove has never failed to boil 450ml of water with 60ml of fuel in any condition, temperature, climate or altitude. The object is to consume as little fuel as needed to burn 450ml of water and the most correct formula I’ve been able to calculate in optimal conditions is 45ml fuel/450ml water. Moderately high winds, incidentally, have never come close to blowing over the kit while in operation… I’ve never felt this comfortable with a canister stove.
The Appalachian set has accompanied me to all parts of Arizona from temperatures hovering freezing to altitudes above 10,000′ and has always performed flawlessly. Evernew’s Appalachian set is indeed highly recommended!
Reach Your Summit!
Please visit The addresses below for further details…
http://www.evernewamerica.com/index.htm
http://www.evernewamerica.com/ECA268.htm
http://www.cascadedesigns.com/platypus/wine-preservation/category
For conversion simplicity…
30ml = 1oz
454g ≈ 1lb
Field photos copyright, © David Drake; Stock photos courtesy http://www.evernewamerica.com/index.htm.
I am not affiliated in any way, shape or form with Evernew, Cascade Designs, Vargo, Snow Peak, Coleman or any other manufacturer or retailer at the time of review. This field review is entirely objective in nature and is meant to provide you with information you may find helpful and/or subjective.
Note: When referencing the weight of equipment I use my personal scale, which has not been calibrated immediately prior to weighing by the office of Weights and Measures or any other official weighing entity and may or may not be completely accurate. When referencing weight obtained from Evernew’s website I use the word “claimed” to reference such weight. I suggest you follow the manufacturer’s claimed weight before depending on mine.
Thank you!
If you have any questions, comments or concerns I’m always pleased to speak with you!
Appalachian Kit Bio-fuel Update (I feel like I’m revisiting an old friend) Review…
For those whom are interested in Bio-Fuel (wood fuel), the following is my updated, hastened review…
And, below, introducing Bru•Ja•Va™, WildDrake’s newest addition to our trail cuisine cafe. You’re going to love this one!
On the morning of March 22nd, we camped at a campground that yielded conditions quite favorable for burning bio-fuel.
In addition to cool, comfortable temperatures, a light breeze, and a slight overcast, there was an abundance of perfectly sized bio-fuel within arms reach, ready for the taking.
I spent the entire night with anticipation for the morning to come. Upon waking, I quickly unleashed my Appalachian kit, assembled it specifically to burn bio-fuel, sat down and, with tremendous enthusiasm and excitement, stocked the stove with bio-fuel.
Quickly, I had a fire going. After pouring water into the pot and setting the pot on to the windscreen/pot support, I had a boil at approximately nine minutes. Twice, however, since I had not burned bio-fuel before, the fire had burned out and I needed to restock and relight. And, restocking the fire is an extremely attentive proposition. I quickly gained perspective of the attention bio-fuel stoves actually need.
The stove consumed more fuel than I expected and I was thankful for the abundance, and the within-arms-reach vicinity of fuel. I’m assuming the generous consumption is because of the copious ventilation ports, small chamber size, and high degree of heat this kit must produce. The fuel all seemed to consist of varieties of oak, pine and manzanita, all of which were thoroughly dry.
I was enjoying the process. Five pots of water, in total, were boiled, the last four slightly faster, in the eight minute range, than the first, now that I was an expert at boiling water using bio-fuel.
While enjoying a couple of cups of Bru•Ja•Va™ and one of our Ere•The•Dawn™ rehydrated breakfasts, here is a pictorial synopsis of our first bio-fuel experience…

Not nearly the quantity of fuel consumed but this was my initial gathering…


I also used the alcohol stove, without the windscreen/pot support, for boiling water. This time, as you can see, I set the mug directly on the stove. Boiling time was literally twenty minutes for approximately 450ml of water using 2oz. of alcohol. Why? Because the mug sat directly on the larger vent, preventing fuel loss and maintaining direct contact with the mug, preserving fuel while allowing the small jets to consume/boil the water. The stove would burn for, on average, close to twenty three minutes, in total, three minutes after the mug of boiling water was removed, with residual fuel left in the stove. For a second and third cup of boiling water I set a fresh cup on the, still flaming, stove to take advantage of whatever fuel was left behind to raise the temperature, allowing these cups of water to burn slightly faster once the stove was restocked with fuel. For contrast, boil time using alcohol and the pot support/windscreen was on average, nine minutes.

In these next two photos, you can easily see how a mug or pot would cover the large diameter vent, leaving the jets exposed to boil water. Very efficient use of fuel but time was greatly consumed…


The mug on the bottom right contains the contents, we’re calling, Bru•Ja•Va™. A sultry mixture of coffee and other ingredients we’ll soon be receiving FDA analysis for and selling commercially…


Following five pots of boiling water, there was a tremendous build-up of consumed fuel that needed to be discarded. At this point, five pots of boiling water, in addition to the three mugs of boiling water on the alcohol stove were enough for our morning Bru•Ja•Va™, breakfast porridge, and fun…

What a mess… Sand, as a scouring agent, would have removed most of this sticky end product but I had decided to wait until I returned home to clean it. I didn’t want to take the risk of scratching the pot. If I was backpacking greater than a single night, sand would indeed have been used to scour this clean…

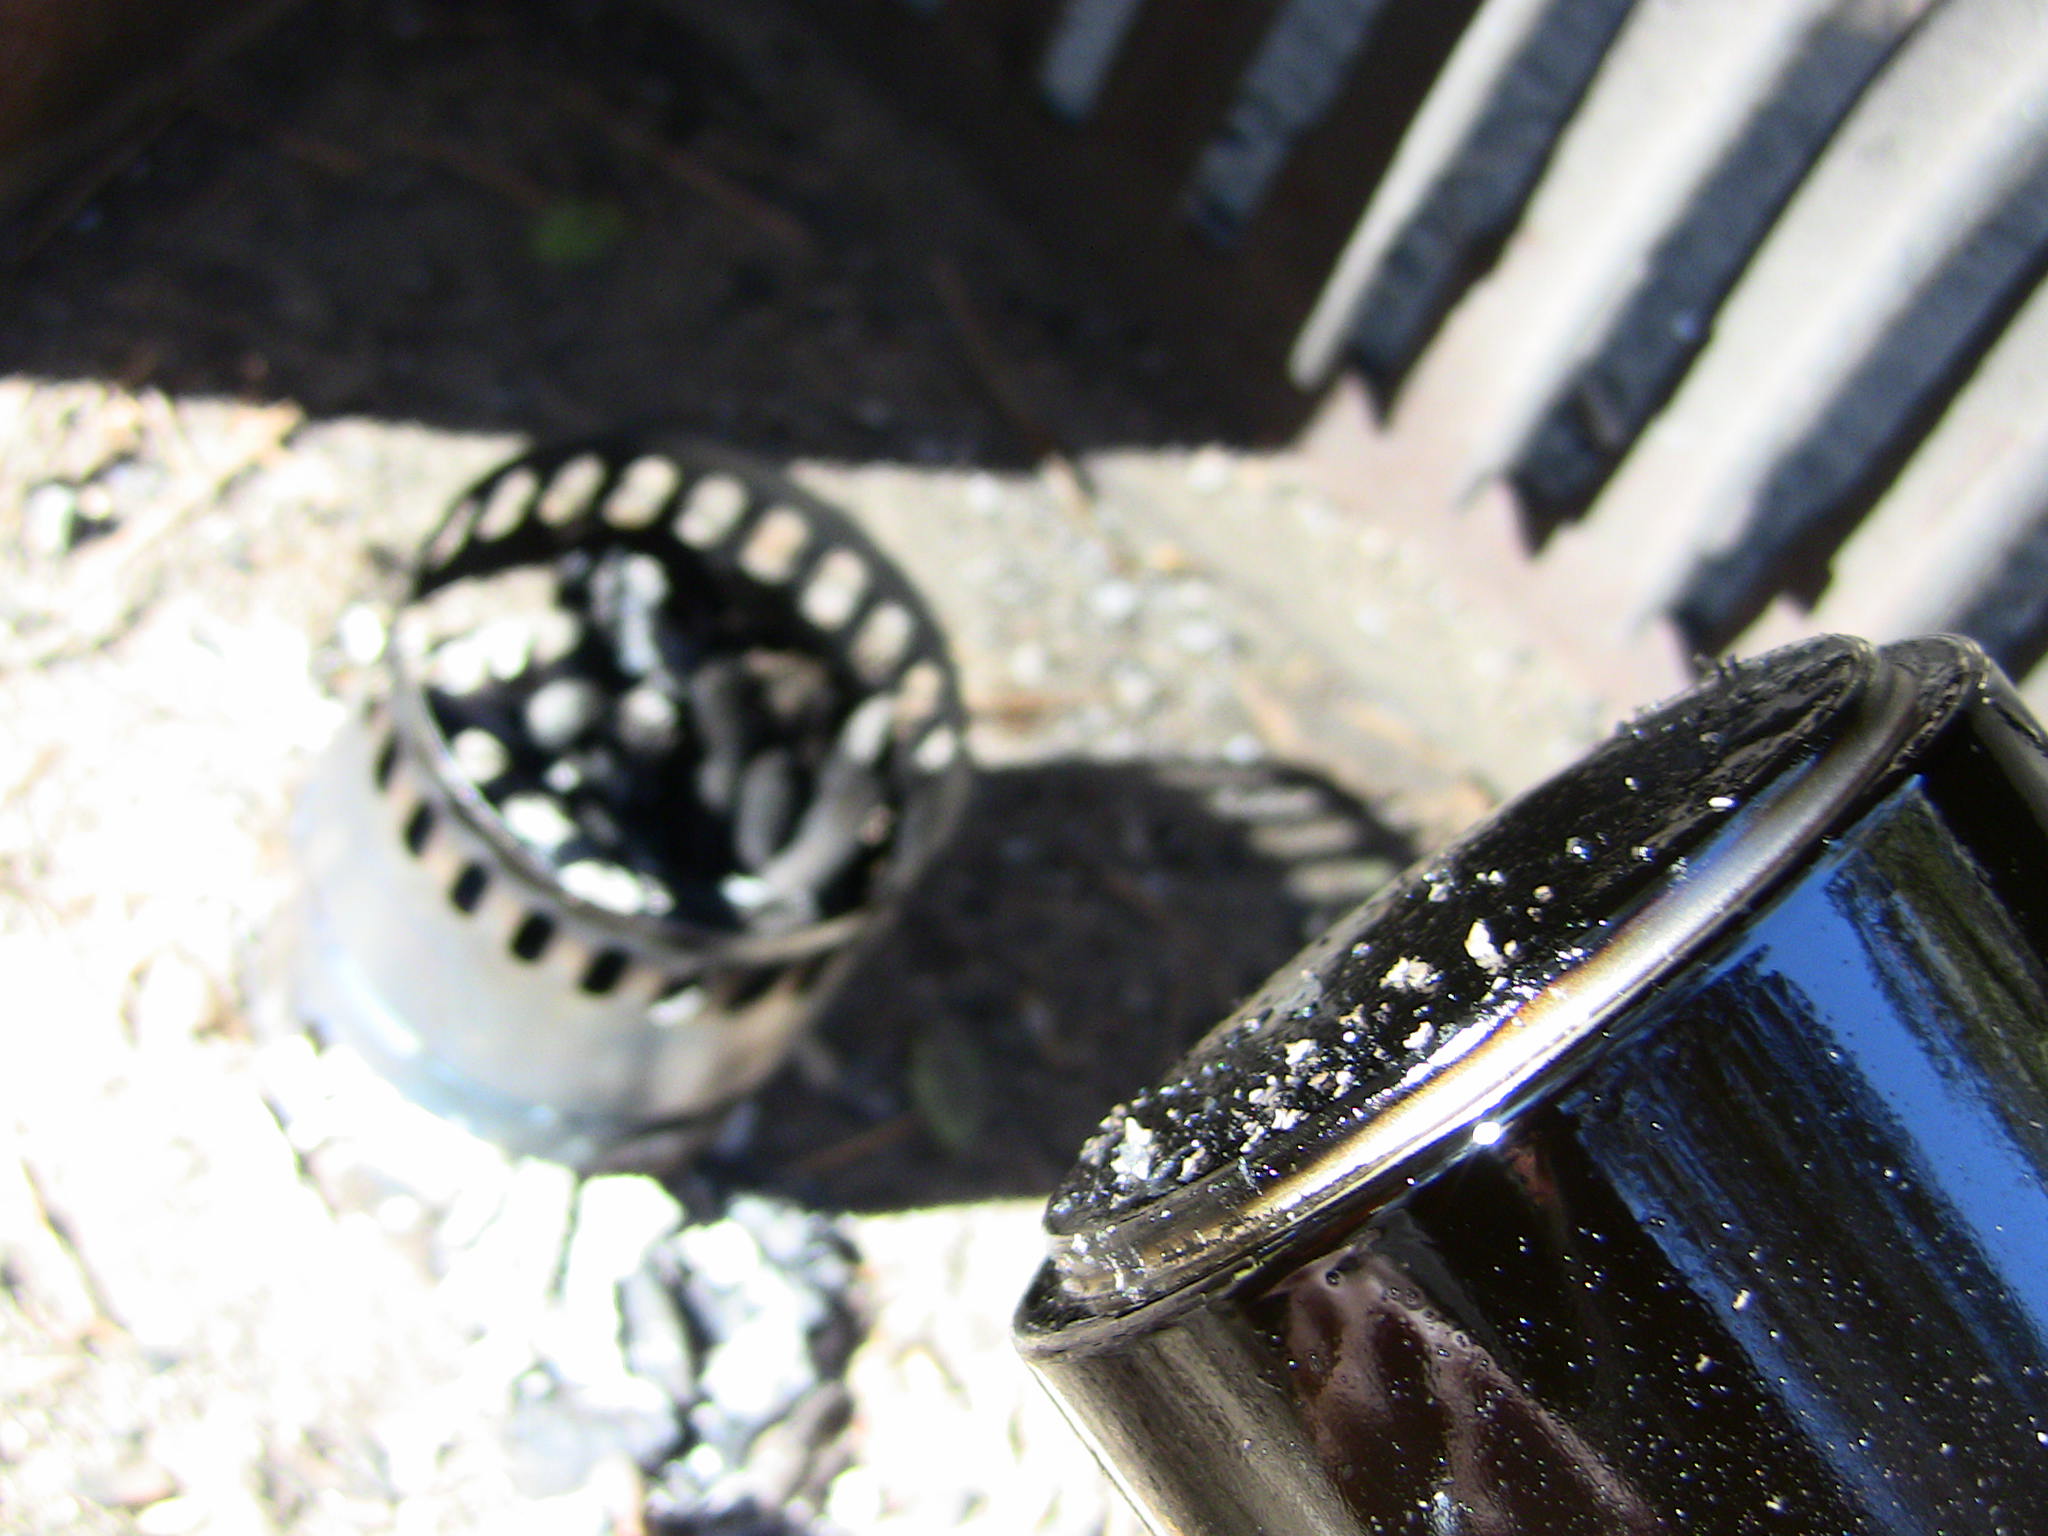

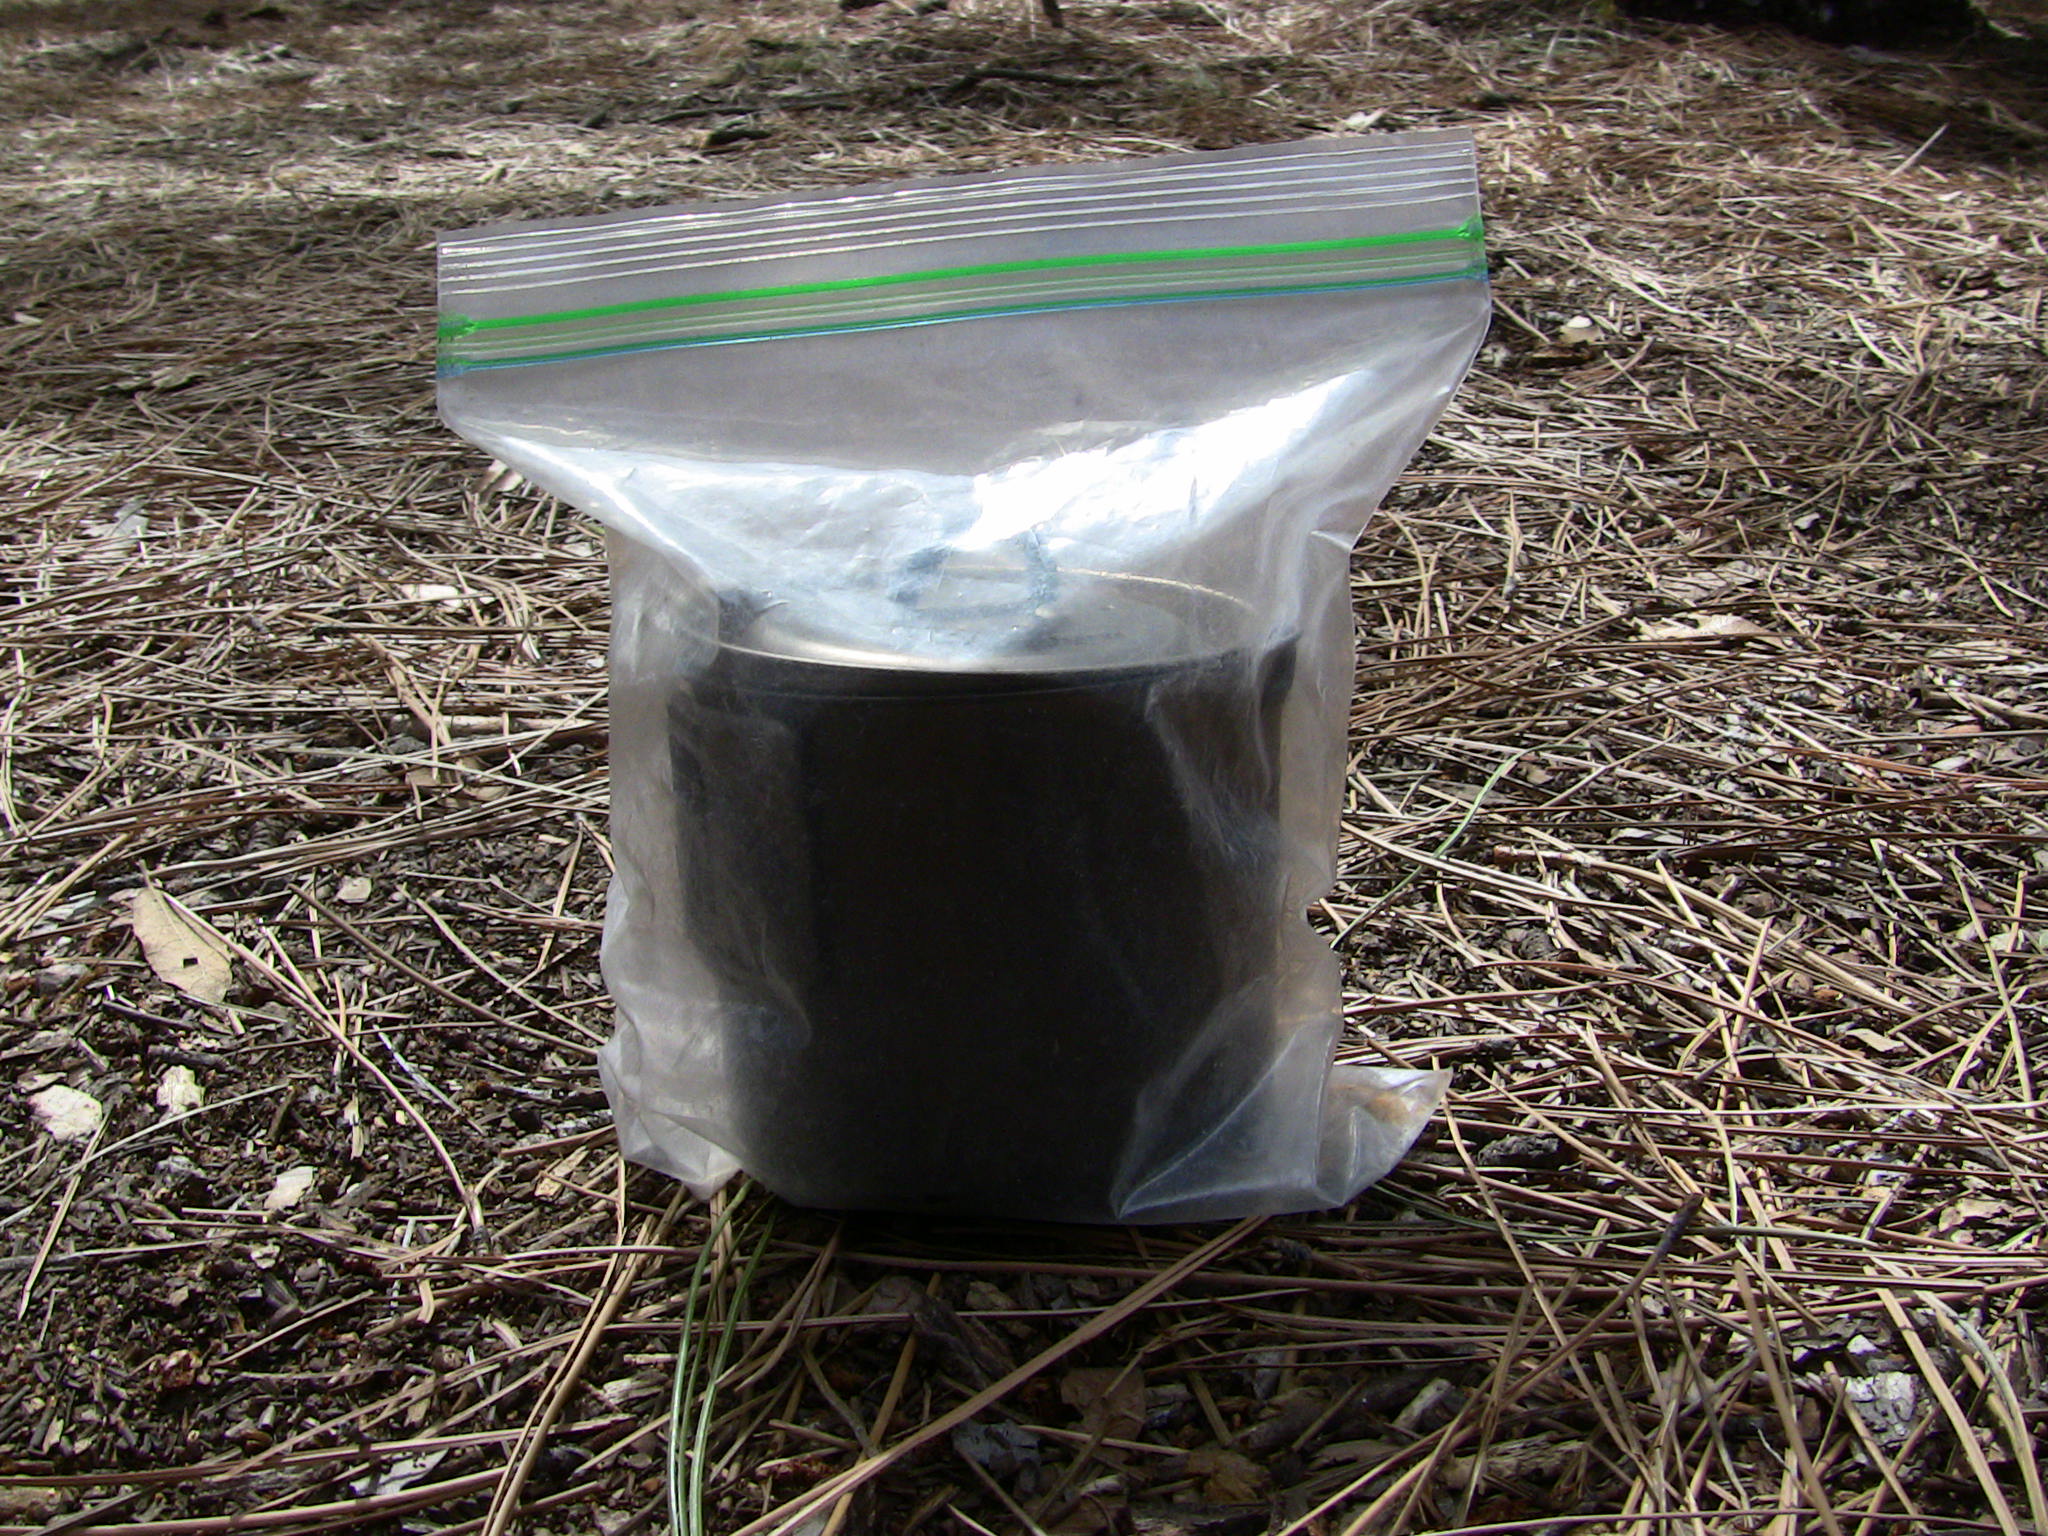
The bio-fuel engaged, filthy, Appalachian kit stored inside the ziploc that once held my Ere•The•Dawn™ dehydrated breakfast porridge… for safe transport back to my kitchen sink, where oven cleaner was used to easily clean the kit…
Thank you, all, for your patience while I found reasonable conditions to safely use bio-fuel.
Reach Your Summit!
All photos, copyright, WildDrake!


You must be logged in to post a comment.